Mom G. got the girls darling J. Crew sweaters for their birthday. I thought they would be fun with white skirts. I looked around at different styles and decided on paper bag skirts. Here is Mariah ready for Spring with her white paper bag skirt!
Want to make your own?
Decide the length you want your skirt. I wanted my girls' skirts to be11 inches. Double this and add 1/2-1 inch for the seam (23 inches). This is the length to cut your fabric. Then double the waist measurement for your width (40 inches). Cut a square of fabric using these measurements. I cut mine 23" x 40". Fold this fabric in half the short way (along the 23" side) and serge/sew the long edge to make a long tube like the picture below. Turn right side out and iron flat with your seam on one of the long sides (not the middle).
You can barely see my seam on the bottom of the tube of fabric.
I used 1 1/2 inch elastic because I like the bigger waistband look but you could use whatever size you like. To make a casing for your elastic, sew one seam about 1/2-1 inch from the top of the tube (along the long side). Then lay your elastic below that seam to judge where your second seam should go. Sew the length of your fabric again.
Your elastic casing should look something like this.
Thread elastic through casing. Be sure to pin the ends so your elastic doesn't slip too far through. (sorry about the upside down picture - not real sure why it's like that!)
Remove your pins holding your elastic and sew the 2 short ends of your fabric tube together to create the skirt.
Turn right side out and put seam in the back center.
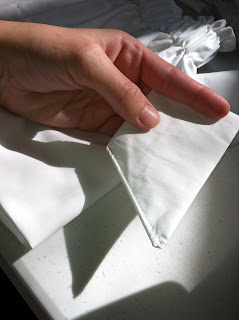
Make a smaller tube of fabric for the tie/bow. I cut a piece of fabric 5"x48", folded it in half, serged the edge, turned right side out, and ironed. Then cut then ends on an angle.
Tuck the angled ends under and sew.
This makes a nice finished point for your tie/bow.
Find the center of your tie strip and sew it onto the skirt right over your back seam.
Done and ready to wear!


No comments:
Post a Comment